Azure AD/Office 365 seamless sign-in – Understand and implement PTA and seamless SSO
Introduction
Microsoft Office 365 provides secure anywhere access to professional email, shared calendars, instant messaging (IM), video conferencing, document collaboration, etc. It represents the cloud version of the Microsoft communication and collaboration products with the latest version of the Microsoft desktop suite for businesses of all sizes.
Azure Active Directory (Azure AD) is the directory behind Office 365 used to store user identities and other tenant properties. Just like the on-premises Active Directory stores the information for Exchange, SharePoint, Lync and your custom Line of Business (LOB) apps, Azure AD stores the information for Exchange Online, SharePoint Online, Skype for Business Online, etc., and any custom applications built in the Microsoft's cloud.
Through the pass-through authentication (PTA) feature, Azure AD provides organizations with the ability to directly authenticate against the organization's Active Directory, allowing their users to use their corporate credentials to access Azure AD/Office 365 and the services that they have been provisioned for, and without the need for complex network infrastructure such as the one required by AD FS (see Part 3, Part 4(bis), and Part 5) or for the on-premises passwords to exist in the cloud in any form (see Part 6 of this whitepaper for the password hash synchronization (PHS) feature).
Important note PTA does NOT support organizations using Alternate Login IDs. For more information on Alternate Login IDs, see article Configuring Alternate Login ID.
In addition, the seamless single sign-on (SSO) feature allows end-users to only need to type their username and not their password to sign in to Azure AD/Office 365 or other cloud apps and services when they are on their corporate machines and connected on the organization's corporate network.
Note For more information, see blog post Introducing #AzureAD Pass-Through Authentication and Seamless Single Sign-on.
Objectives of this paper
This document complements Part 1 and Part 2 of this whitepaper by providing an end-to-end walkthrough to rollout a working PTA and seamless SSO configuration for Azure AD/Office 365.
Non-objectives of this paper
It doesn't provide an understanding of the different seamless sign-in deployment options with Azure AD/Office 365. This is specifically the intent of the aforementioned first part that covers all the key aspects the readers should understand to successfully achieve seamless sign-in with Azure AD/Office 365 for their organization.
Organization of this paper
To cover the aforementioned objectives, this document is organized in the following 4 sections:
- Setting up the base configuration test lab.
- Setting up PTA and seamless SSO with the Azure AD/Office 365 tenant.
- Understanding PTA and seamless SSO.
- Monitoring your on-premises deployment (Optional).
These sections provide the information details necessary to (hopefully) successfully build a working environment for the scenario. They must be followed in order.
About the audience
This document is thus intended for system architects and IT professionals who are interested in understanding the PTA and seamless SSO features of Azure AD/Office 365 from a hand-practice perspective.
Setting up the base configuration test lab
By following the instructions outlined hereafter, you should be able to successfully prepare your on-premises test lab environment based on virtual machines (VMs) running in Azure to later deploy and configure the test environment, install and configure it.
In order to complete the document's walkthrough, you need an environment that consists of the following components for the Azure-based test lab infrastructure:
- Two computers running Windows Server 2012 R2 (named DC1 respectively DC2 by default) that will be configured as a domain controller with a test user and group accounts, and Domain Name System (DNS) servers. DC1 will host Azure AD Connect for the sync between the Azure-based test lab infrastructure and the Azure AD/Office 365 subscription.,
- One intranet computer running Windows 8.1 (named LAPTOP1).
If you've already followed the walkthrough of Part 2, the DC1 and DC2 computers that pertain to the Azure-based test lab infrastructure should already be in place. If you haven't yet conducted this rollout, this is the time to do so.
The rest of this document makes the assumption that such an evaluation environment is in place. You don't need the ADFS1, ADFS2, WAP1, and WAP2 computers that are part of this lab environment. You can leave them turned off for the rest of this document.
The above Azure VMs will enable you to:
- Connect to the Internet to install updates, and access Internet resources in real time.
- Later configure them with Azure AD Connect to finally get a relevant Azure-based test infrastructure.
- Remotely managed those using a Point-to-Site (P2S) connection and then Remote Desktop (RDP) connections by your computer that is connected to the Internet or your organization network.
Note You must be logged on as a member of the Domain Admins group or a member of the Administrators group on each computer to complete the tasks described in this guide. If you cannot complete a task while you are logged on with an account that is a member of the Administrators group, try performing the task while you are logged on with an account that is a member of the Domain Admins group.
- Create snapshots so that you can easily return to a desired configuration for further learning and experimentation.
For illustration purposes, we've opted to configure the domain litware369.com (LITWARE369). You will have to choose in lieu of a domain name of yours. For checking purpose, you can for instance use the domain search capability provided by several popular domain name registrars.
Whenever a reference to litware369.com
is made in a procedure, it has to be replaced by the DNS domain name of your choice to reflect accordingly the change in naming. Likewise, any reference to LITWARE369 should be substituted by the NETBIOS domain name of your choice.
For the sake of simplicity, the same password "Pass@word1!?" is used throughout the procedures detailed in this document. This is neither mandatory nor recommended in a real-world scenario.
To perform all the tasks in this guide, we will use the local administrator account AzureAdmin or alternatively the LITWARE369 domain administrator account AzureAdmin for each VM, unless instructed otherwise.
Deploying the LAPTOP1 computer in the test lab environment
See eponym section in Part 6 of this whitepaper.
Joining the LAPTOP1 computer to the LITWARE369 domain
See eponym section in Part 6 of this whitepaper.
Accessing the various machines of the test lab environment
See eponym section in Part 2 of this whitepaper.
Setting up PTA and seamless SSO with the Azure AD/Office 365 tenant
This section provides a walkthrough on how to setup pass-through authentication (PTA) and seamless single sign-on (SSO) between the on-premises Active Directory (e.g. litware369.com) and the Azure AD/Office 365 tenant (e.g. litware369.onmicrosoft.com) to offer a seamless user experience to access cloud resources, for example an Office 365 Enterprise E3 subscription in our configuration.
For the sake of simplicity, and to set up the directory synchronization and the password hash synchronization between the on-premises infrastructure of our test lab environment in Azure and the litware369.onmicrosoft.com tenant in the cloud, we will leverage the single and unified wizard Azure Active Directory Connect (Azure AD Connect).
Azure AD Connect indeed provides a single and unified wizard that streamlines the overall onboarding process for both directory synchronization (single or multiple directories) AND single sign-on if you want to, and thus that automatically performs the following steps: download and setup of all the pre-requisites, download, setup and guided configuration of the synchronization engine, activation of the synchronization in the Azure AD tenant, setup, and/or configuration of AD FS, etc.
Azure AD Connect is the one stop shop for connecting your on-premises directories to Azure AD, whether you are evaluating, piloting, or in production.
Note For more information, see articles Integrating your on-premises identities with Azure Active Directory.
In the context of this part, Azure AD Connect is the delivery mechanism to install Azure AD Application Proxy which PTA uses. The Azure AD Application Proxy connector will be installed on the Azure AD Connect computer and will be registered to handle pass-through authentication traffic.
Important Note The Azure AD Application Proxy installed with Azure AD Connect will only work with Azure AD Connect, Azure AD Application Proxy connectors should be hosted on other servers.
This section walks you through the use of the single wizard Azure AD Connect on the DC1 computer to fully configure the Azure-based infrastructure from an identity perspective and establish the identity bridge between it and your Azure AD/Office 365 subscription.
It comprises the following eight steps:
- Downloading Azure AD Connect.
- Executing Azure AD Connect and installing the first instance of the PTA connector.
- Configuring additional tasks.
- Deploying and configuring a second instance of the connector for PTA.
- Configuring the seamless single sign-on in the LITWARE369 domain
- Verifying the synchronization on the Azure AD/Office 365 tenant.
- Verifying the simple sign-on with the Azure AD/Office 365 tenant.
- Verifying the seamless single sign-on (SSO) with the Azure AD/Office 365 tenant.
The following subsections describe each of these steps in the context of our test lab environment.
Downloading Azure AD Connect
Azure AD Connect is a single wizard that performs all the steps you would otherwise have to do manually to connect your Active Directory (and local directories if any) to Azure AD. Azure AD Connect will:
- Install pre-requisites like the Azure Active Directory Module for Windows PowerShell (64-bit version) and Microsoft Online Services Sign-In Assistant.
Note The Azure Active Directory PowerShell Module is regularly updated with new features and functionality. The above link should always point to the most current version of the module. For more information, see article Microsoft Azure Active Directory PowerShell Module Version Release History.
- Install and configure the sync engine, and enable directory synchronization in the customer's Azure tenant.
- Configures either password sync (w/ optional seamless single sign-on), path-through authentication (w/ optional seamless single sign-on), or AD FS, depending on which sign-on option the customer prefers, and includes any required configuration in Azure.
- Verifies everything is working.
Azure AD Connect is the best way to connect your on-premises directory with Azure AD and Office 365. Azure AD Connect is replacing DirSync and Azure AD Sync and these two older sync engines are deprecated from April 13, 2016 reaching end of support April 13,2017.
Note For additional information, see article
Upgrade Windows Azure Active Directory Sync ("DirSync") and Azure Active Directory Sync ("Azure AD Sync").
To download the latest version of Azure AD Connect (e.g. version 1.1.380.0 at the time of this writing), proceed with the following steps:
- Open a remote desktop connection on the DC1 computer. Follow the instructions as per section Accessing the various machines of the test lab environment and specify in step 2 "10.0.0.101" for the DC1 computer. Log on as the LITWARE369 domain administrator account AzureAdmin with "Pass@word1!?" as password.
- Open a browsing session and navigate to:
http://www.microsoft.com/en-us/download/details.aspx?id=47594.
- Click Download to download the Azure AD Connect MSI file (AzureADConnect.msi).

- Click Save.
Executing Azure AD Connect and installing the first instance of the PTA connector
Before executing Azure AD Connect, you must know the credentials:
- A domain account that is local administrator on the aforementioned computers.
- Active Directory enterprise administrator credentials.
- Azure AD tenant global administrator credentials.
If you've followed in order all the steps outlined before, all the above prerequisites should be enforced at this stage. So you should be good to go.
To execute Azure AD Connect and configure your identity infrastructure, proceed with the following steps:
- Open a remote desktop connection on the DC1 computer that will be also your sync server. Follow the instructions as per section Accessing the various machines of the test lab environment and specify in step 2 "10.0.0.101" for the DC1 computer. Log on as the LITWARE369 domain administrator account AzureAdmin with "Pass@word1!?" as password.
- Run AzureADConnect.msi to launch the wizard.
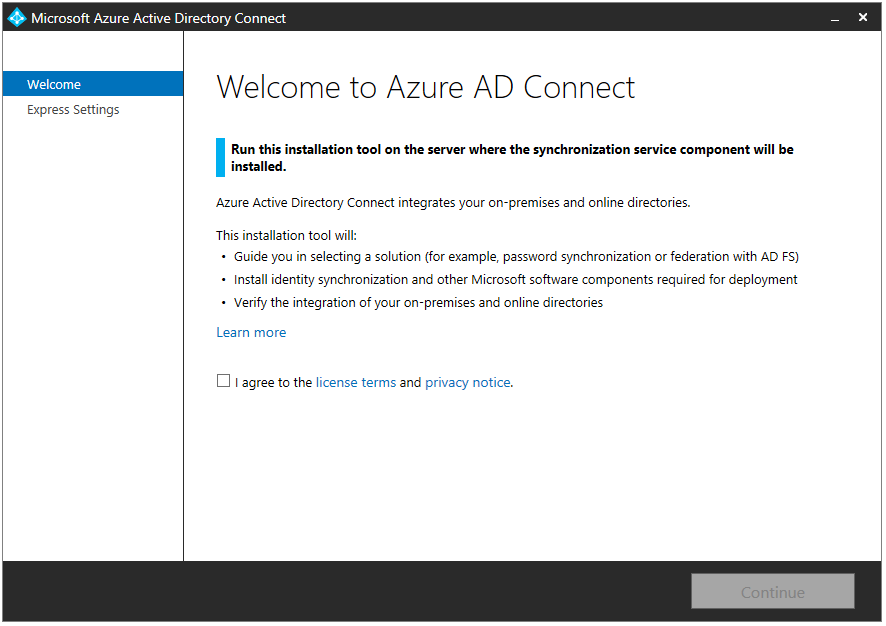
- On the Welcome to Azure AD Connect page, check I agree to the license terms and privacy notice and click Continue.
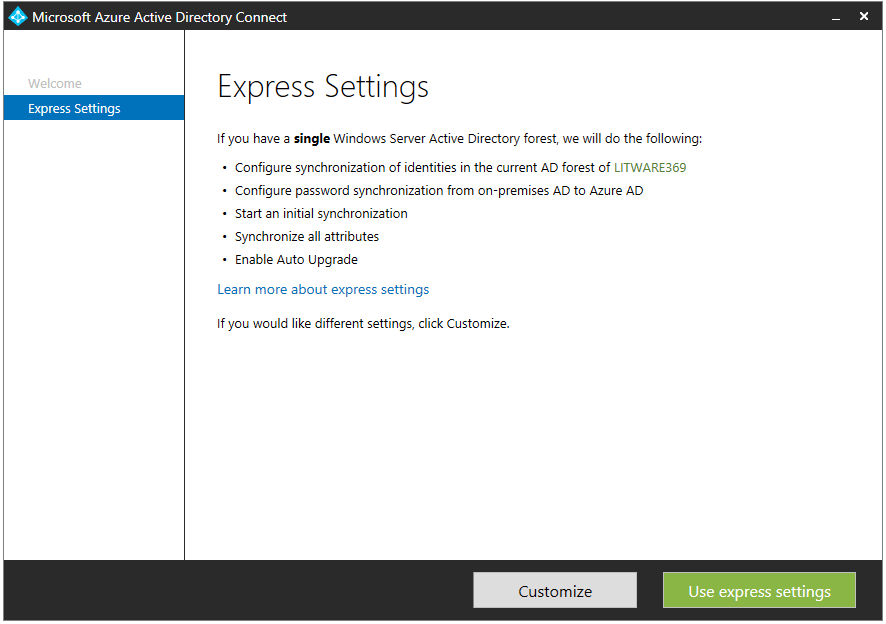
- On the Express Settings page, click Customize.

- On the Install required components page, review the information, select any optional configuration that you require, although it's okay to leave these unselected, and click Install.

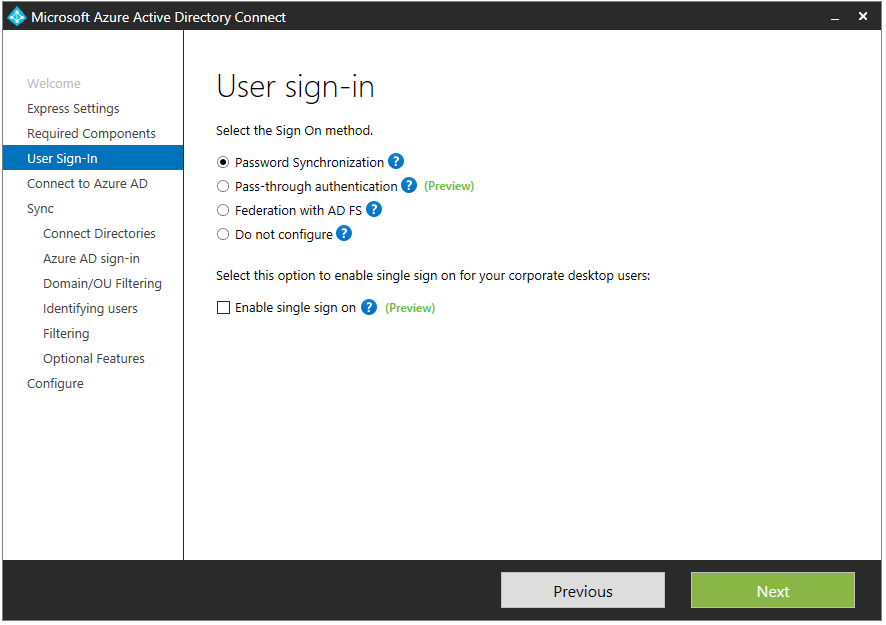
- On the User sign-in page, select Pass-through authentication.

- Select Enable single sign on.

- Click Next.

- On the Connect to Azure AD page, enter your global admin Azure AD credentials when prompted.
Username: admin@litware369.onmicrosoft.com
Password: Pass@word1!?
Click Next.

- On the Connect your directories page, select your local active directory and enter AD credentials.
Username: LIWARE369\AzureAdmin
Password: Pass@word1!?
Click Add Directory.

- Click Next.

- On the Azure AD sign-in configuration page, leave USER PRINCIPAL NAME as is, i.e. userPrincipalName selected, and click Next.

- On the Domain and OU filtering page, leave Sync all domains and OUs selected, and click Next.

- On the Uniquely identifying your users page, leave Users are represented only once across all directories selected, leave SOURCE ANCHOR as is, i.e. objectGUID selected, and click Next.
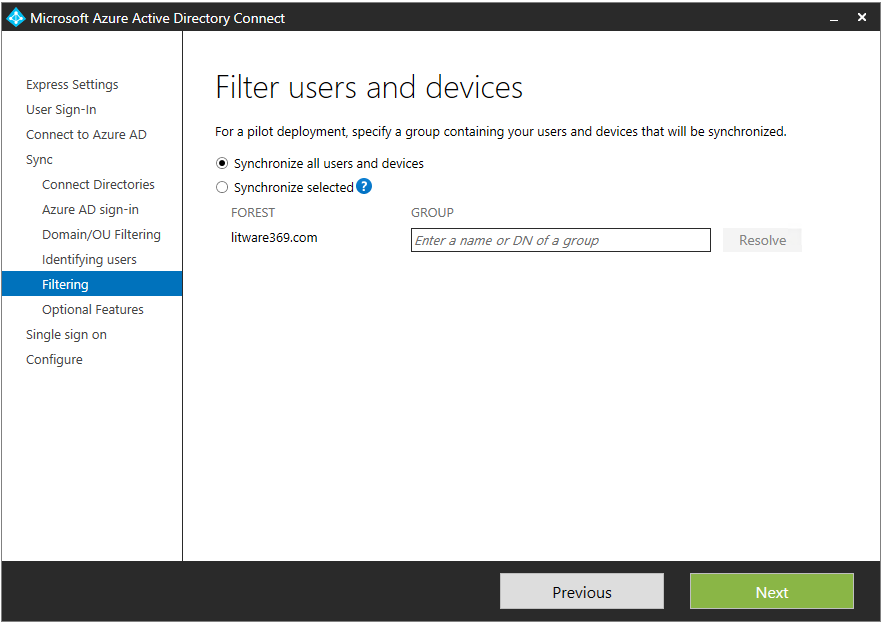
- On the Filter users and devices page, leave Synchronize all users and devices selected, and then click Next.

- On the Optional features page, select any additional features that you need, although it's okay to leave these unselected, and then click Next.

- On the Enable single sign on page, click Enter domain administrator credentials. A Windows Security dialog pops up.

- Enter AD credentials, and then click OK.
Username: AzureAdmin
Password: Pass@word1!?
 ,
,
- Click Next.

- On the Ready to configure page, leave checked Start the synchronization process as soon as the configuration completes for starting the synchronization process.
Note You may assume the synchronization process will automatically start at a later time if the check mark is removed. This is not correct as you will need to enable the task in Scheduled Tasks on the server where the synchronization tool is installed. After the task is enabled, synchronization occurs every 30 minutes by default.
- Click Install. When installation completes, verify the installation.
Note Logs regarding the Azure AD Connect installation can be found in the %LocalAppData%\AADCONNECT folder. Likewise, issues with the Azure AD App Proxy connector installation are exposed in the Event Viewer log under "Application and Service Logs\Microsoft\AadApplicationProxy\Connector\Admin".

- Click Exit.
Configuring additional tasks
You may wish to add scale or refine your options right away, or after some time has passed.
To configure additional task, proceed with the following steps:
- Whilst still being connected on the DC1 computer, launch the wizard again using the Start page or the desktop icon called Azure AD Connect.

- Click Configure.

- The Optional features page lists the tasks that are relevant to your configuration. Select the relevant task to your configuration you'd like to conduct, click Next, and follow the instructions.
- Once completed, click Exit.
Let's see how to verify the synchronization on the Azure AD/Office 365 tenant.
Setting up a second instance of the connector for PTA
A second connector can be installed for high availability purposes. This comprises the following steps:
- Downloading the connector for PTA.
- Installing and configuring the connector for PTA.
Note For more information, see article What is Azure AD Pass-through Authentication.
Note A second connector can be installed for high availability purposes
Downloading the connector for PTA
To download the connector for PTA, proceed with the following steps:
- Open a remote desktop connection on the DC2 computer. Follow the instructions as per section Accessing the various machines of the test lab environment and specify in step 2 "10.0.0.102" for the DC2 computer. Log on as the LITWARE369 domain administrator account AzureAdmin with "Pass@word1!?" as password.
- Open a browsing session and download the latest version of the connector from: https://go.microsoft.com/fwlink/?linkid=837580
- Click Download to download the Azure AD Application Proxy Connector MSI file (AADApplicationProxyConnectorInstaller.msi).

- Open an elevated Command prompt.
- Run the following command:
PS C:\> AADApplicationProxyConnectorInstaller.exe REGISTERCONNECTOR="false" /q
Installing and configuring the connector for PTA
To install and configure the connector for PTA, proceed with the following steps:
- Open an elevated Windows PowerShell or PowerShell Integrated Scripting Environment (ISE) prompt, navigate to C:\Program Files\Microsoft AAD App Proxy Connector.
- Run the following script:
PS C:\> .\RegisterConnector.ps1 -modulePath "C:\Program Files\Microsoft AAD App Proxy Connector\Modules\" -moduleName "AppProxyPSModule" -Feature PassthroughAuthentication
When prompted, enter the credentials of your global admin Azure AD credentials:
Username: admin@litware369.onmicrosoft.com
Password: Pass@word1!?
Note As already outlined, issues with the Azure AD App Proxy connector installation are exposed in the Event Viewer log under "Application and Service Logs\Microsoft\AadApplicationProxy\Connector\Admin".
Configuring the seamless single sign-on (SSO) in the LITWARE369 domain
Seamless single sign-on (SSO) is an option that can be enabled in Azure AD Connect with either password (hash of) hash synchronization (PHS) (see Part 6 of this paper) or pass-through authentication (PTA). When enabled, users only need type their username and do not need not to type their password to sign in to Azure AD or other cloud services when they are on their corporate machines and connected on the corporate network.
For users to use seamless SSO in your environment, you need to ensure that they are:
- On a domain joined computer.
- Have a direct connection to a domain controller, for example on the corporate wired or wireless network or via a remote access connection such as a VPN connection. This role is played by the LAPTOP1 computer that you've previously provisioned on the test lab environment.
- Define the Kerberos end-points in the cloud as part of the browsers' Intranet zone.
If any of the above items are not present, such as the computer is off the corporate network and Active Directory is not available, then users will simply be prompted to enter their password as they would without seamless SSO.
Note For more information, see article What is Single Sign On (SSO) (preview).
Ensuring clients sign-in automatically from the corporate network
By default, browsers will not attempt sending credentials to web servers unless the URL is defined in the Intranet zone. In so far as the URLs used for seamless SSO in Azure AD contain a period because they are globally routable hostnames, they have to be explicitly added to the computer's Intranet zone, so that the browser will automatically send the currently logged in user's credentials in the form of a Kerberos ticket to Azure AD.
The easiest way to add the required URLs to the Intranet zone is to simply create a group policy in Active Directory or use an existing one.
Proceed with the following steps:
- Whilst still being connected on the DC2 computer, open an elevated command prompt if none, and run the following command:
PS C:\> gpmc.msc
A Group Policy Management window brings up.

- Double-click the name of the forest, double-click Domains, and double-click the name of the domain.

- Right-click Default Domain Policy, and then click Edit. A Group Policy Management Editor window brings up.
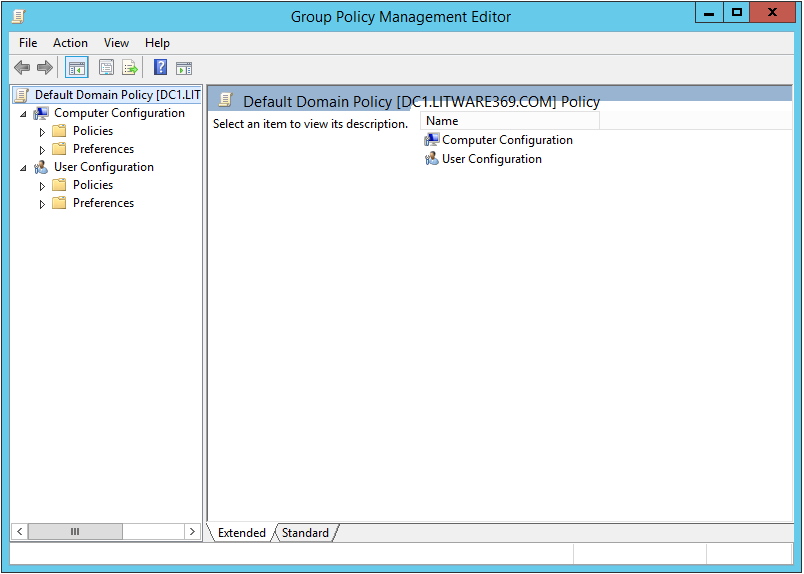
- In the console tree, expand Group policy that will be applied to all users. For example, the Default Domain Policy.
- Navigate to User Configuration\Policies\Administrative Templates\Windows Components\Internet Explorer\Internet Control Panel\Security Page and select Site to Zone Assignment List.
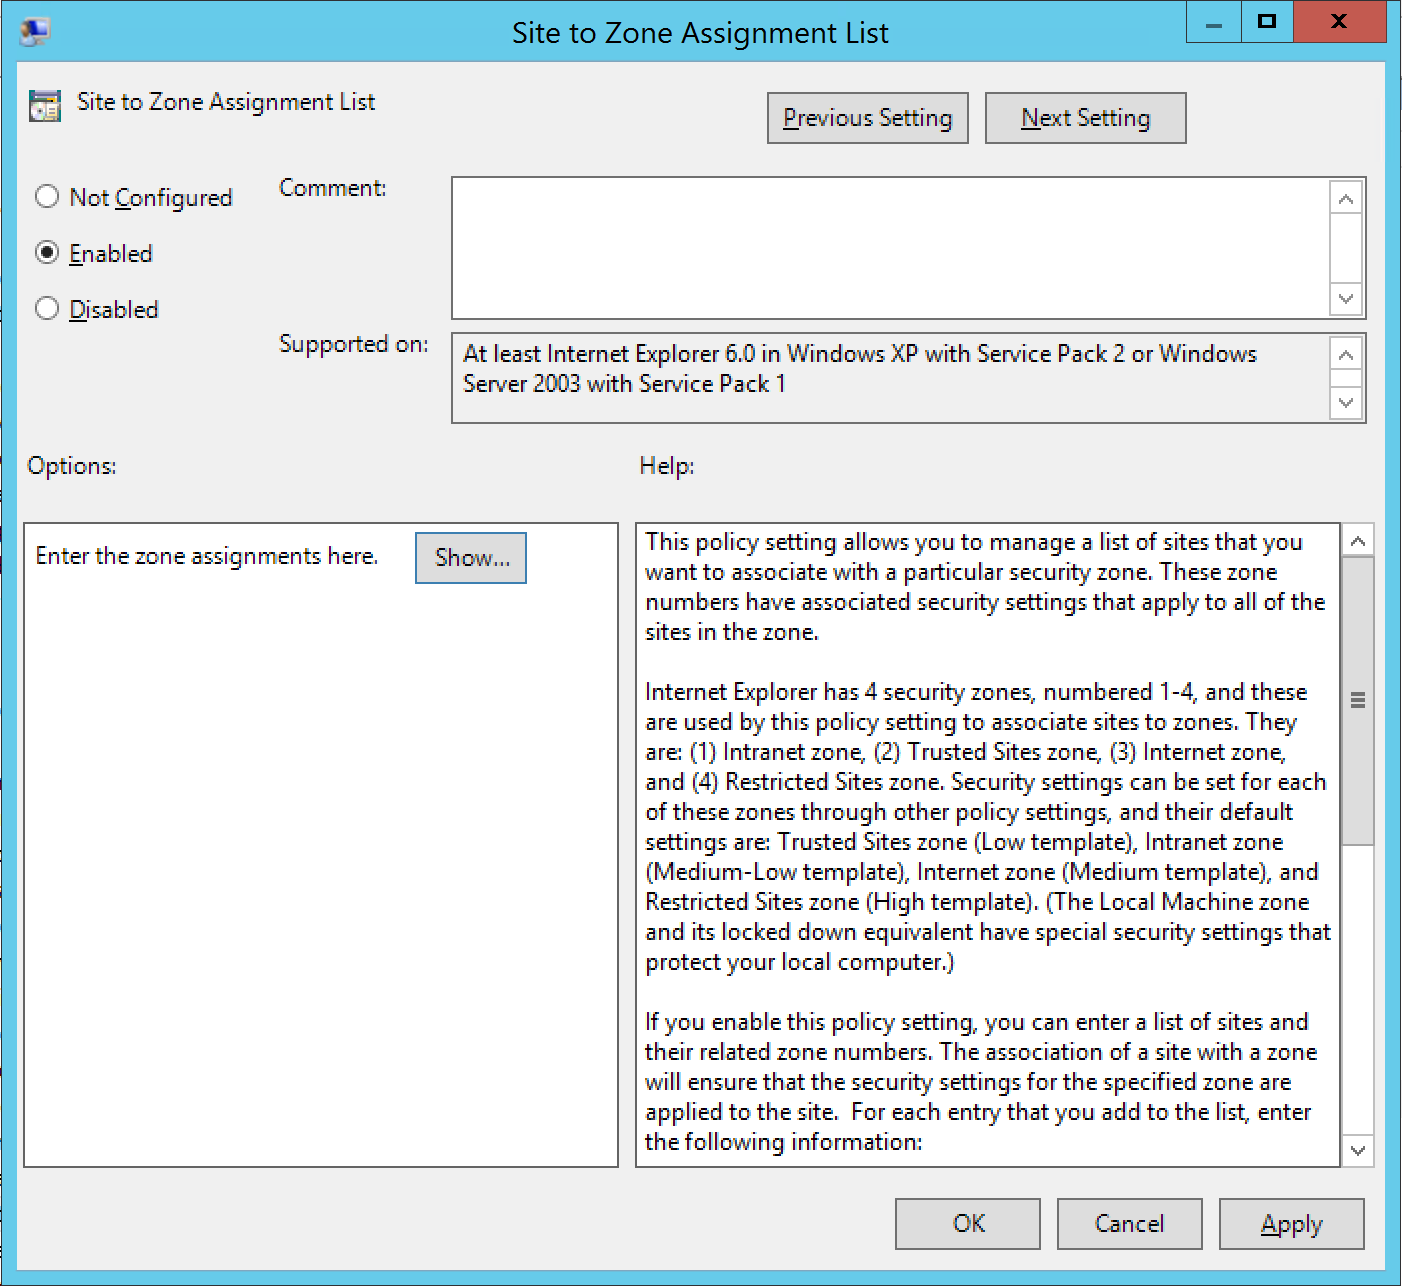
- Enable the policy, and enter the following values/data in the dialog box.
- Value: https://autologon.microsoftazuread-sso.com Data: 1
- Value: https://aadg.windows.net.nsatc.net Data: 1
-

- Click OK twice.
Verifying the synchronization on the Azure AD/Office 365 tenant
To verify the synchronization on the Azure AD tenant, proceed with the following steps:
- Open a browsing session and navigate to the Azure portal at https://portal.azure.com.
- Sign in with your administrative credentials to your Azure subscription.
- On the left pane of the Azure management portal, click Azure Active Directory. A Litware369 blade opens up.
Note If Azure Active Directory is not listed, click More Services, type "Azure", and the select Azure Active Directory.
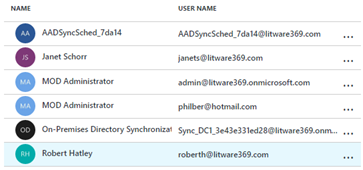
- In the Quick tasks tile, click Find a user. A Users and groups – All Users blade opens up.
- Confirm that both Janet Schorr and Robert Hatley are listed.
Verifying the pass-through authentication (PTA) with the Azure AD/Office 365 tenant
To verify the "same sign-on" with the Azure AD/Office 365 tenant (e.g. litware369.onmicrosoft.com), proceed with the following steps:
- Open a browsing session from your external local computer and navigate to the Office 365 portal at https://portal.office.com.
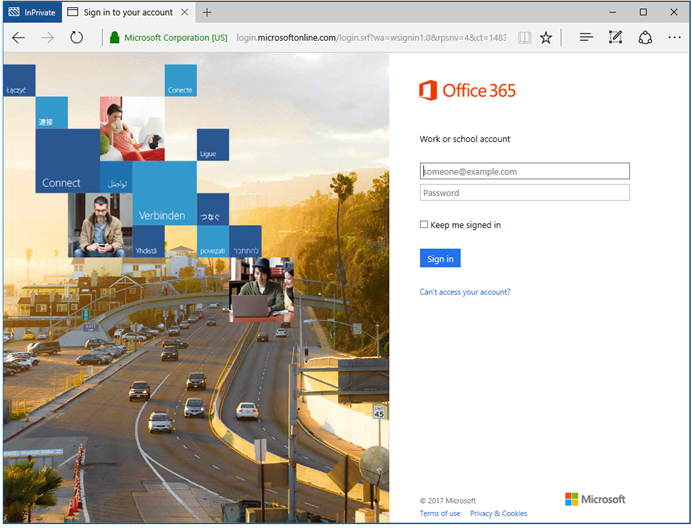
- Type janets@litware369.com and specify your Active Directory password.
If pass-through authentication (PTA) is correctly set up, your credentials are passed to the on-premises Active Directory forest, and, if verified, you should have a seamless access to the signed in user settings in the Office 365 portal.
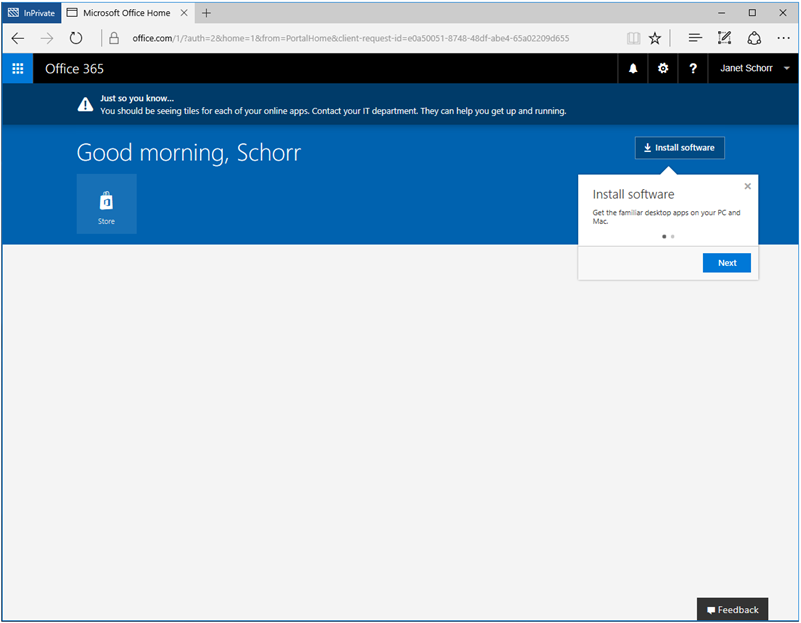
No tiles are displayed for the online apps. This is expected for the test user as in fact you have not assigned a license to the test user.
Verifying the seamless single sign-on (SSO) with the Azure AD/Office 365 tenant
To verify the seamless single sign-on (SSO) with the Azure AD/Office 365 tenant (e.g. litware369.onmicrosoft.com), proceed with the following steps:
- Open a remote desktop connection on the LAPTOP1 computer. Follow the instructions as per section Accessing the various machines of the test lab environment and specify in step 2 the IP address for the LAPTOP1 computer. Log on as the LITWARE369 user account JanetS with "Pass@word1!?" as password.
- Open a browsing session from your external local computer and navigate to the Office 365 portal at https://portal.office.com.
If seamless single sign-on (SSO) is correctly set up, you should have a seamless access to the signed in user settings in the Office 365 portal.
No tiles are displayed for the online apps. This is expected for the test user as in fact you have not assigned a license to the test user.
Troubleshooting the configuration
Troubleshooting PTA
When troubleshooting pass-through authentication (PTA), there are a few different categories of problems that can occur. Depending on the type of problem you may need to look in different places.
Note For more information, see article What is Azure AD Pass-through Authentication.
Connector issues
To resolves connector issues, you can start investigating the followings:
Note For more information, see article Troubleshoot Application Proxy.
- For errors that relate to the Azure AD Application Proxy connector, you can check as mentioned before the Event Log of the connector's computer under "Application and Service Logs\Microsoft\AadApplicationProxy\Connector\Admin".
- Additional information can also be found in the trace logs for the connector in:
C:\Users\AzureAdmin\AppData\Local\AADConnect\Trace-YYYYMMDD-XXXXXX.log
-or-
C:\Programdata\Microsoft\Microsoft AAD Application Proxy Connector\Trace
- If needed, more detailed logs are available by viewing the analytics and debugging logs, and enabling the connector session log. Note it is not recommended to run with this log enabled by default and the contents are only visible after the log is disabled.
Authentication and Kerberos issues
To resolves authentication and Kerberos issues, you can start investigating the followings:
- For errors related to Kerberos authentication, you can check Security and System Event Log on domain controllers. Issues can be linked to different date and time between back end connector and domain controllers or wrong or missing Service Principal Names (SPN) in Active Directory:
XML filter can be used to get relevant information about PTA Connector in the security Event
<QueryList>
   <Query Id="0" Path="Security">
      <Select Path="Security">*[EventData[Data[@Name='ProcessName'] and (Data='C:\Program Files\Microsoft AAD App
      Proxy Connector\ApplicationProxyConnectorService.exe')]]</Select>
   </Query>
</QueryList>
-
Additional information can also be found in the trace logs in C:\Programdata\Microsoft\Microsoft AAD Application Proxy Connector\Trace. These logs also include the reason that pass-through authentication failed for an individual user.
-
Network Monitor can also be used to analyze Kerberos traffic and get specific error code.
-
Use Net helpmsg <ReasonCode> to get more information from an error code.
-
Network issues
As the PTA feature uses the Azure AD Application Proxy connector for all requests, we expect most errors to come from network configuration problems. If there is a firewall in the path, make sure that it's open so that the connector can make HTTPS (TCP) requests to the Azure AD Application Proxy. The connector uses a series of ports together with subdomains that are part of the high-level domains msappproxy.net and servicebus.windows.net. Make sure to open the following ports to outbound traffic.
Note For more information, see article Enable Application Proxy in the Azure portal.
A tool to help checking for network problems can be downloaded at http://aka.ms/aadapConnectorTroubleshoot :

Troubleshooting seamless SSO
It is important to make sure the client is correctly configured for seamless SSO including the following:
Note For more information, see article What is Single Sign On (SSO) (preview).
-
Both https://autologon.microsoftazuread-sso.com and https://aadg.windows.net.nsatc.net are defined within the Intranet zone.
-
Ensure the computer is joined to the domain, for example the LITWARE369 domain in our configuration.
-
Ensure the user is logged on with a domain account.
-
Ensure the computer is connected to the corporate network, for example on the Internal-sn in our test lab configuration.
-
Ensure that the computer's time is synchronized with the Active Directory and the domain controllers time is within 5 minutes of the correct time.
-
Purge the clients existing Kerberos tickets, for example by running the following command from an elevated command prompt.
C:\> "klist purge"
-
Ensure the Kerberos SPNs are present and correct for the AzureADSSOAcc$ account in Active Directory.


If you have been able to confirm the above requirements, you can review the console logs of the browser for additional information. The console logs can be found under developer tools. This will help you determine the potential problem.
Every time a user logs in with single sign on an entry is recorded in the event log of the domain controller, if success auditing is enabled. To find these events, you can review the Event logs for the security Event 4769 associated with computer account AzureADSSOAcc$.
The filter below finds all security events associated with the computer account:
<QueryList>
   <Query Id="0" Path="Security">
      <Select Path="Security">*[EventData[Data[@Name='ServiceName'] and (Data='AZUREADSSOACC$')]]</Select>
   </Query>
<QueryList>
You are now in a position to further test the environment.
Understanding PTA and seamless SSO
Understanding PTA
Supported clients
Pass-through authentication (PTA) is supported via web browser based clients and Office clients that support modern authentication.
For clients that are not support such as legacy Office clients, Exchange active sync (i.e. native email clients on mobile devices), customers are encouraged to use the modern authentication equivalent.
This not only allows the PTA feature, but also allows for conditional access to be applied, such as multi-factor authentication.
Understanding PTA sign-in
Let's illustrate a typical PTA flow.
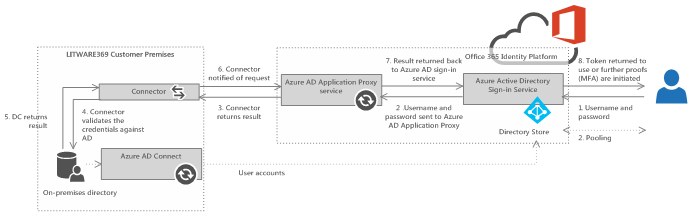
Figure 1 Pass-through authentication flow
-
When a user enters their username and password into the Azure AD sign-in page.
-
Azure AD sent the username and password to the Azure AD Application Proxy service.
-
The Azure AD Application Proxy service places the username and password on the appropriate on-premises connector queue for validation.
-
One of the available on-premises connectors then retrieves the username and password and validates it against Active Directory.
-
The validation occurs over standard Windows APIs similar to how Active Directory Federation Services (AD FS) validates password. The on-premises domain controller then evaluates the request and returns a response to the connector.
-
The connector returns this to the Azure AD Application Proxy service.
-
The Azure AD Application Proxy service returns it back in turn to Azure AD.
-
Azure AD then evaluates the response and responds to the user as appropriate, for example by issuing a token for the application or asking for multi-factor authentication (MFA).
Understanding seamless SSO
Supported clients
The seamless SSO feature is supported via web browser based clients and Office clients that support modern authentication on computers that are capable of Kerberos authentication, such as Windows.
The following table provides details of the browser based clients on various operating systems.
Table 1 Supported clients per OS/Browsers
|
Operating systems |
Internet Explorer |
Chrome |
Firefox |
Edge |
|
Windows 10 |
Yes |
Yes |
Yes* |
No |
|
Windows 8.1 |
Yes |
Yes |
Yes* |
N/A |
|
Windows 8 |
Yes |
Yes |
Yes* |
N/A |
|
Windows 7 |
Yes |
Yes |
Yes* |
N/A |
|
Mac OS/X |
N/A |
N/A |
N/A |
N/A |
* Requires separate configuration
A word about modern authentication
Modern authentication is an OAuth-based authentication stack used by Office 2013/2016 client applications against Office 365. This enables sign-in features such as Multi-Factor Authentication (MFA), SAML 2.0-based third-party identity providers with Office 2013/2016 client applications, smart card and certificate-based authentication, and it removes the need for Outlook to use the basic authentication protocol.
From a technical implementation standpoint, the Active Directory Authentication Library (ADAL) replaces for Windows clients the Microsoft Online Sign-in Assistant (SIA).
Understanding seamless SSO flows
Let's illustrate a typical seamless SSO flow.

Figure 2 Seamless SSO flow
First the user attempts to access a resource that trusts security tokens issued from Azure AD, such as SharePoint Online (SPO) for Office 365. SharePoint Online then redirects the user to authenticate against Azure AD. The user is then invited to provide their username so that Azure AD can establish if the seamless SSO feature is enabled for their organization. Assuming seamless SSO is enabled for the organization, the following occurs:
-
Azure AD challenges the client, via a 401 unauthorized response, to provide a Kerberos ticket.
-
The client requests a ticket from Active Directory for the Azure AD.
-
Active Directory locates the computer account, created by Azure AD Connect and returns a Kerberos ticket to the client, encrypted with the machine account's secret. The ticket includes the identity of the user currently signed in to the computer.
-
The client sends the Kerberos ticket it acquired from Active Directory to Azure AD.
-
Azure AD decrypts the Kerberos ticket using the previously shared key, and then either returns a token to the user or asks the user to provide additional proofs such as multi-factor authentication as required by the resource.
Seamless SSO is an opportunistic feature, which means that if it fails for some reason, the user simply need only enter their password on the sign-in page as usual.
Monitoring your on-premises deployment (Optional)
This last section of this document provides and introduction to Azure Active Directory Connect Health (Azure AD Connect Health). This cloud based service in the
new Azure Portal helps you monitor and gain insight into health, performance and login activity of your on-premises identity infrastructure. It thus offers you the ability to view alerts, performance, usage patterns, configuration settings, enables you to maintain a reliable Azure AD connection, and much more.
Azure AD Connect Health represents a key part of our effort to help you monitor and secure your cloud and on-premises identity infrastructure.
Note For more information, see article Monitor your on-premises identity infrastructure and synchronization services in the cloud.
Note Azure AD Connect Health is a feature of the Azure AD Premium P1 edition. For a description of this edition below and a comparison table, see article Azure Active Directory editions.
This section walks you through the process of configuring this service for your existing on-premises deployment as per this document. The process consists in the following five steps:
-
Getting started with the Azure AD Connect Health service.
-
Configuring Azure AD Connect Health for Sync.
-
Configuring Azure AD Connect Health for AD DS.
-
Using the Azure AD Connect Health service.
The following subsections describe in the context of our test lab environment each of these steps.
Like before, and unless noticed otherwise, all the instructions should be done on the DC1 computer.
Getting started with the Azure AD Connect Health service
To get started with and use the Azure AD Connect Health service, proceed with the following tasks:
-
Open a browsing session for your external personal computer and navigate to the Azure portal at https://portal.azure.com/.
-
Sign in when prompted with your Azure AD/Office 365 Enterprise global administrator account such as:
Username: admin@litware369.onmicrosoft.com
Password: Pass@word1!?
Click Next.
-
Click the Marketplace tile, and then select Security + Identity, or search for it by typing "Identity".
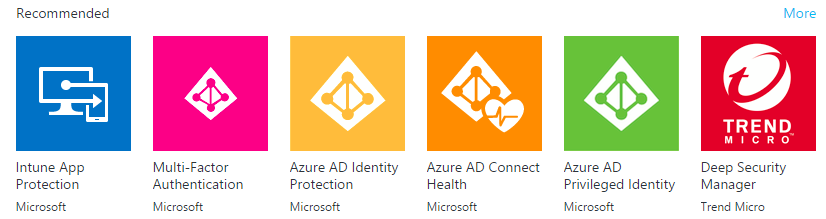
-
Under recommended, click Azure AD Connect Health. An introductory blade opens up.

-
Click Create. This will open another blade with your directory information.

-
Click Create.
Note If you do not have an Azure Active Directory Premium P1 license, you will need one to use Azure AD Connect Health as previously noticed. See article What is Microsoft Azure Active Directory licensing?. You can sign-up for a trial at https://portal.office.com/Signup/Signup.aspx?OfferId=01824d11-5ad8-447f-8523-666b0848b381.
Once created, you can now access the Azure AD Connect Health Portal that allows you to view alerts, performance monitoring, and usage analytics. Upon first accessing Azure AD Connect Health, a first blade is presented.
In order to see any data in your instance of Azure AD Connect Health, you will need to install the Azure AD Connect Health agents on your targeted servers, for example the six computers in our configuration. This is the purpose of the next sections.
Configuring Azure AD Connect Health for Sync
The Azure AD Connect Health agent for Sync is installed as part of the Azure AD Connect installation (version 1.0.9125.0 or higher). So this is already completed with our prior installation and configuration of Azure AD Connect (version 1.1.380.0 in our configuration). See section Integrating your on-premises AD forest(s) with your Azure AD/Office 365 tenant.
To verify the agent has been installed, look for the following services on the DC1 computer. If you completed the configuration, they should already be running:
-
Azure AD Connect Health Sync Insights Service.
-
Azure AD Connect Health Sync Monitoring Service.
Note For more information, see article Azure AD Connect Health Agent Installation.
Configuring Azure AD Connect Health for AD DS
Downloading the health agent for AD DS
To download the latest version of health agent for AD DS, proceed with the following steps:
-
Open a remote desktop connection on the DC1 computer that will be also your sync server. Follow the instructions as per section Accessing the various machines of the test lab environment and specify in step 2 "10.0.0.101" for the DC1 computer. Log on as the LITWARE369 domain administrator account AzureAdmin with "Pass@word1!?" as password.
-
Open a browsing session and navigate to the Azure AD Connect Health portal.
-
Click the Quick Start tile. An eponym Quick Start blade opens up.
-
Under Get tools, click Download Azure AD Connect Health for AD DS to download the health agent (AdHealthAddsAgentSetup.exe)

-
Click Save.
-
Repeat above steps on the DC2 computer.
Installing and configuring the health agent for AD DS
To download the latest version of health agent for AD DS, proceed with the following steps:
-
Open a remote desktop connection on the DC1 computer that will be also your sync server. Follow the instructions as per section Accessing the various machines of the test lab environment and specify in step 2 "10.0.0.101" for the DC1 computer. Log on as the LITWARE369 domain administrator account AzureAdmin with "Pass@word1!?" as password.
-
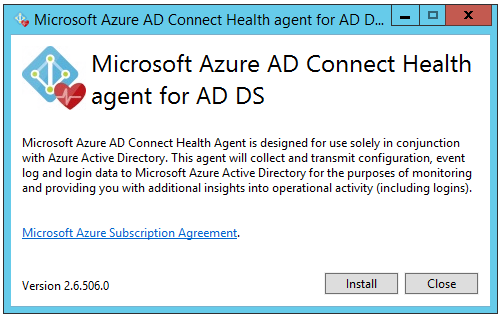
Double-click the AdHealthAddsAgentSetup.exe file you've downloaded in the previous section. A dialog pops up.
-
The Azure Active Directory Connect Health Setup dialog shows up.
-
On the first screen, read the EULA, and then click Install. The install begins.

-
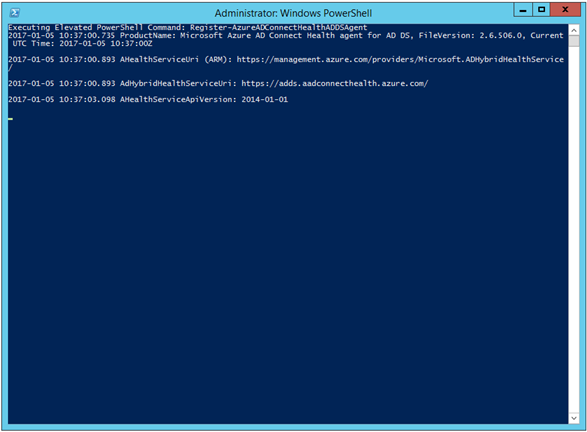
Once the installation is finished, click Configure Now. A command prompt with elevated privileges opens up.

As stated, an elevated PowerShell command prompt is then launched to execute the following command while the initial command prompt closes:
Register-AzureADConnectHealthADDSAgent
-
A Sign in to your account dialog opens up.
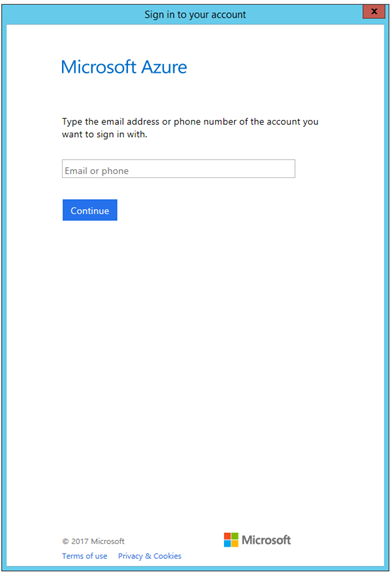
-
Type "admin@litware369.onmicrosoft.com" for your Azure AD/Office 365 Enterprise global administrator and click Continue.

-
Enter the password of the admin@litware369.onmicrosoft.com user, e.g. "Pass@word1!?" in our configuration, and then click Sign in. The health agent registration process starts.
Executing Elevated PowerShell Command: Register-AzureADConnectHealthADDSAgent
2017-01-05 10:37:00.735 ProductName: Microsoft Azure AD Connect Health agent for AD DS, FileVersion:
 UTC Time: 2017-01-05 10:37:00Z
2017-01-05 10:37:00.893 AHealthServiceUri (ARM): https://management.azure.com/providers/Microsoft.ADH/
2017-01-05 10:37:00.893 AdHybridHealthServiceUri: https://adds.aadconnecthealth.azure.com/
2017-01-05 10:37:03.098 AHealthServiceApiVersion: 2014-01-01
2017-01-05 10:43:28.828 Detecting AdDomainService roles...
2017-01-05 10:43:29.562 Detected the following role(s) for litware369.com:
2017-01-05 10:43:29.562         Active Directory Domain Services
2017-01-05 10:43:34.915 Aquiring Monitoring Service certificate using tenant.cert
2017-01-05 10:43:42.506 Successfully aquired and stored Monitoring Service certificate: Subject=CN=DC
c-4be2-9b86-5b3513ecb22e, OU=Microsoft ADFS Agent, Issuer=CN=Microsoft PolicyKeyService Certificate A
nt=25E0F7EE2D344DF31888B7E223795DFD29D4DFBF
2017-01-05 10:43:42.521 Fetched and stored agent credentials successfully...
2017-01-05 10:43:44.432 Started agent services successfully...
Test-AzureADConnectHealthConnectivity completed successfully...
2017-01-05 10:44:02.807 Agent registration completed successfully.
Detailed log file created in temporary directory:
C:\Users\AzureAdmin.LITWARE369\AppData\Local\Temp\2\AdHealthAddsAgentConfiguration.2017-01-05_10-37-00.log
PS C:\Users\AzureAdmin.LITWARE369\Downloads>
-
To verify the agent has been successfully installed and configured, click Tools in Server Manager, and then select Services. An eponym window Services opens up.
-
Look for the following services:
-
Azure AD Connect Health AD DS Insights Service.
-
Azure AD Connect Health AD DS Monitoring Service.
These services should be started automatically and the agent will be now monitoring and gathering data.
-
Repeat above steps on the DC2 computer.
Note For more information, see article Azure AD Connect Health Agent Installation.
At this stage, you should now be in position to monitor your on-premises deployment.
Using the Azure AD Connect Health service
To now use the Azure AD Connect Health service, proceed with the following tasks:
-
Open a browsing session and navigate to the Azure Preview Portal at https://portal.azure.com/.
-
Sign in when prompted with your Azure AD/Office 365 Enterprise global administrator account such as:
Username: admin@litware369.onmicrosoft.com
Password: Pass@word1!?
-
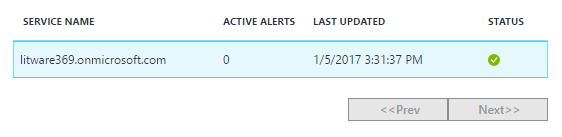
Select Azure AD Connect Health. An introductory blade opens up.
-
Click Azure Active Directory Connect (Sync). An eponym blade opens up. Synchronization should appear as healthy.
-
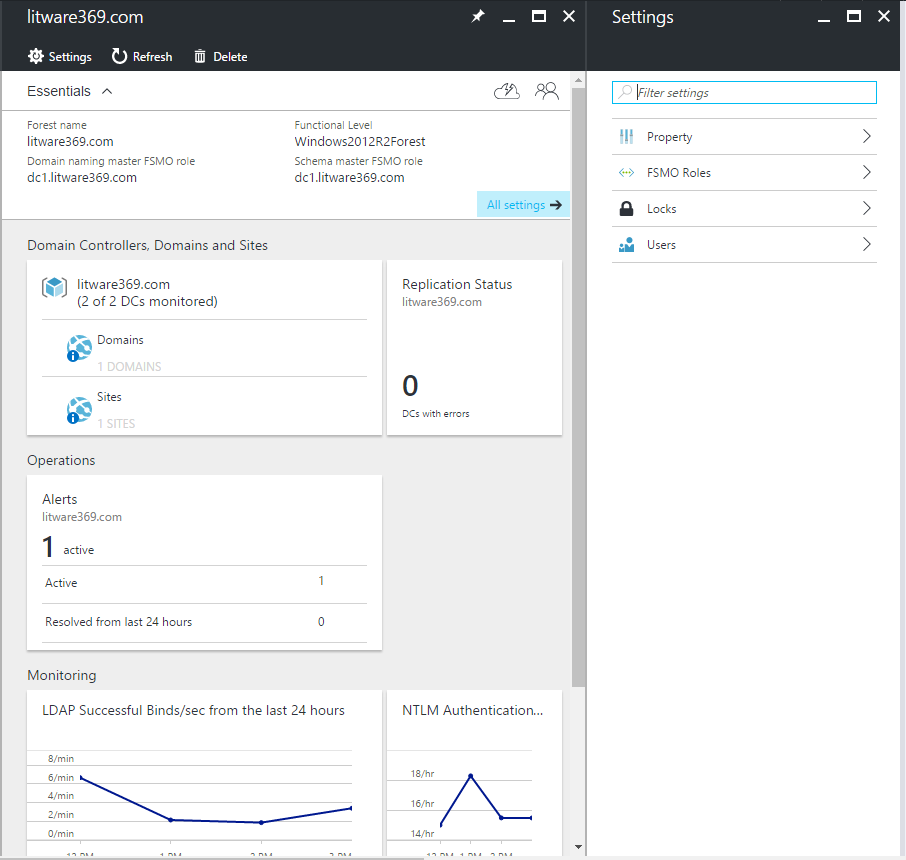
Back to introductory blade of Azure AD Connect Health, finally click Active Directory Domain services. A new blade opens up for AD DS as you might expect.
Note For more information on the various health topics (alerts, performance monitoring, usage analytics, properties, etc.), see articles Azure AD Connect Health Operations, Using Azure AD Connect Health for sync, Using Azure AD Connect Health with AD FS, and Using Azure AD Connect Health with AD DS.