Azure SQL DB - Technical deployment
Introduction
This document is a step by step guide to creating an Azure SQL DB within the context of an Azure Cloud Solution Provider (CSP) subscription for a customer by the CSP reseller. The purpose is to help service provider administrators become familiar with the process (and the variety of mechanisms available) to create an Azure SQL DB.
This guide discusses:
- Creating an Azure Resource Manager (ARM) template to define a SQL DB and its related properties and dependencies.
- Deploying the ARM template via PowerShell and the Azure CLI.
- Creating an Azure SQL DB using the Azure partner portal.
This guide assumes and understanding of Azure deployment and automation technologies such as ARM templates, PowerShell, the CLI, and the portal.
Create Azure SQL DB via ARM Template for a customer as a CSP reseller
The following are the sequence of steps to be performed:
- Create an ARM template for Azure SQL DB
- Deploy the ARM template as a reseller to the customer subscription on behalf of the customer. This can be done in following ways:
- Using PowerShell
- Using CLI
- Via REST API
- Using PowerShell
Create the ARM Template for Azure SQL DB
Prerequisites
The following are the prerequisites for this section:
- The ARM template is a JSON file. To create it, any text editor can be used. Visual Studio is used here as it is easier to write ARM templates including the built-in templates and editing support. If using Visual Studio, the following are needed:
- Visual Studio 2013 with update 4 or higher
- Azure SDK 2.7 or higher
- Visual Studio 2013 with update 4 or higher
Create ARM Template
- Open Visual Studio. Create a new project for this ARM template.
( File -> New -> Project and Select Cloud -> Azure Resource Group)

- Provide a name and location for the template.
- Select Blank Template to create a new template with only the basic ARM structure.

- In the solution explorer pane, expand the Templates folder.
- Select azuredeploy.json.
- The ARM template (basic structure) is displayed.
- Select azuredeploy.json.
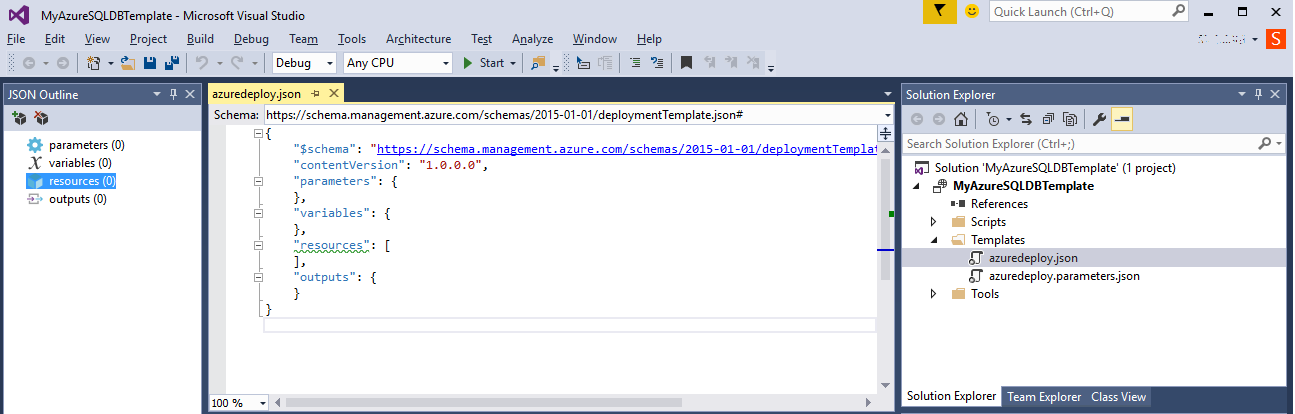
- The resources section of the JSON file contains the resources to be deployed. The common fields for a resource to be deployed are contained in the resources array:
resources: [ {
"name": "",
"type": "",
"location": "",
"apiVersion": "",
"properties": { } ,
"resources": [ ]
} ]
Add Resources
- A logical server needs to be provisioned to host the Azure SQL DB.
- Add resources by selecting the resources node of the JSON Outline pane.
- Right click the resources node.
- Select Add New Resource. Select SQL Server.
- Add resources by selecting the resources node of the JSON Outline pane.


- Name the resource (ex., sqlserver). Click Add.
- Two properties (sqlserverAdminLogin, and sqlserverAdminLoginPassword) are automatically parameterized and added to the properties node. They were also added to the azuredeploy.parameter.json file.
- A firewall resource is also created. The dependsOn field of this resource defines other resources that must be successfully provisioned before this resource can be provisioned. In this case, the firewall resource depends on the sql server.
Dependent resources are defined by the dependsOn field.
Dependent resources are provisioned sequentially.
Non-dependent resources are provisioned in parallel.
- Two properties (sqlserverAdminLogin, and sqlserverAdminLoginPassword) are automatically parameterized and added to the properties node. They were also added to the azuredeploy.parameter.json file.

- Modify the IP address range in the firewall resource. IP addresses in the range specified here are allowed access to the SQL server:
"properties": {
"startIpAddress": "<Start IP of the IP Address range to allow access to SQL server>",
"endIpAddress": "<End IP of the IP Address range to allow access to SQL server>"
}
- Add the Azure SQL DB resource
- Add resources by selecting the resources node of the JSON Outline pane.
- Right click the resources node.
- Select Add New Resource. Select SQL Database.
- Add resources by selecting the resources node of the JSON Outline pane.

- Name the resource (ex., sqldb).
- Select the SQL server resource created in the previous step (ex., sqlserver).
- The Azure SQL DB resource is added to the JSON file (in the resources node).
- The dependsOn field of this resource defines other resources that must be successfully provisioned before this resource can be provisioned. In this case, the DB resource depends on the sql server.

- Save the ARM template.
Update Parameter Values
- In the solution explorer pane, expand the Templates folder. Select azuredeploy.parameters.json. The parameters file contains the values of the parameters/variables used by the ARM template. Both JSON files are processed during provisioning.
- Update the parameter values as illustrated below.
"parameters": {
"<Param1 name here>": {
"value": "<Param1 value here>"
},
"<Param2 name here>": {
"value": "<Param2 value here>"
},
{ },
}Example:
"parameters": {
"sqlserverAdminLogin": {
"value": "AdmUsr1"
}
}

- Save the parameters file.
The ARM template and paired parameters file are now ready for deployment. Deployment can be accomplished through several methods:
PowerShell
CLI
REST API
Only the PowerShell and CLI methods are described in the following sections.
Deploy SQL Azure DB ARM Template - Azure PowerShell
Prerequisites
The following are the prerequisites for this section:
- The Customer and Azure subscription for the customer are already created by the CSP reseller.
- A machine having Azure PowerShell installed. Steps mentioned below to configure the same:
- Navigate to the following link and install Web Platform Installer: https://www.microsoft.com/web/downloads/platform.aspx
- Click on Products link and Select Windows Azure folder on left hand side.
- Navigate to the following link and install Web Platform Installer: https://www.microsoft.com/web/downloads/platform.aspx

- Click on Add and then, Click on install and let the install complete.
Deploy ARM Template via PowerShell
- Open Azure PowerShell window.
- Login to customer subscription using the following cmdlet:
Login-AzureRmAccount
- When prompted for credentials, enter the reseller credentials:
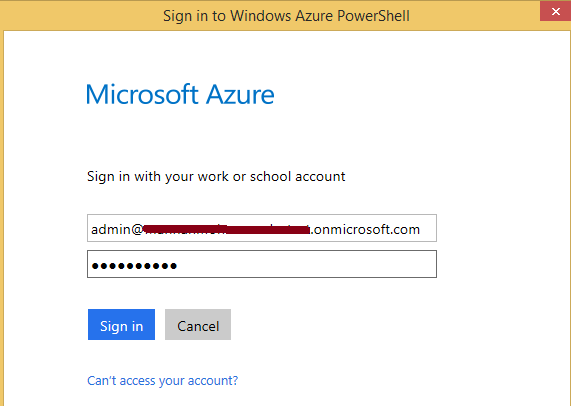
- After successful login, the account details will be shown as below:

- Select the CSP Azure subscription of the customer by running the following cmdlet:
Select-AzureRmSubscription -tenantid "<TenantID>" -subscriptionid "<Azure Subscription Id>"

- Create the Resource Group by running the following cmdlet:
New-AzureRmResourceGroup -Name "<new resource group name>" -Location "<Azure DC location for resource group>"

- Deploy the ARM template by running the following cmdlet:
New-AzureRmResourceGroupDeployment -ResourceGroupName "<resource group name>" –TemplateFile "<Path for template JSON file>"
–TemplateParameterFile "<Path for parameter JSON file>"

- Wait for the deployment to complete.
- If any errors have caused deployment to fail, view the error description, take appropriate action, and rerun the previous step. Common causes could be invalid template file, missing parameters, incorrect parameters like invalid name for Logical SQL Server name, etc.
- If any errors have caused deployment to fail, view the error description, take appropriate action, and rerun the previous step. Common causes could be invalid template file, missing parameters, incorrect parameters like invalid name for Logical SQL Server name, etc.

- Open SQL Management Studio and connect to the logical server deployed using the username and password specified during deployment.

- On successful login, the database created will be present.
- If unable to login, check the error message displayed - common cause could be IP Address of client machine not being added for access to logical server.
- If unable to login, check the error message displayed - common cause could be IP Address of client machine not being added for access to logical server.

Deploy Azure SQL DB ARM Template - CLI
Prerequisites
The following are the prerequisites for this section:
- The Customer and Azure subscription for the customer are already created by the CSP reseller.
- A machine having Azure CLI installed. Steps mentioned below to configure the same on Linux - Ubuntu 14.04 (Visit https://azure.microsoft.com/en-in/documentation/articles/xplat-cli-install/ for setting up Azure CLI on Windows or Mac or different version of Linux):
- Login to the Ubuntu Linux command shell.
- Azure CLI requires Node.js. Run the following commands to install Node.js and npm:
sudo apt-get install nodejs-legacy
- Login to the Ubuntu Linux command shell.

sudo apt-get install npm

- Run the following command to install Azure CLI:
sudo npm install -g azure-cli

Deploy ARM template via CLI
- Switch the mode to Azure Resource Manager by running the following command:
azure config mode arm

- Login to customer subscription using the following command:
azure login –u <reseller credentials' username> --tenant <customer domain name here>

- Create the Resource Group using the template by running the following CLI command:
Azure group create –n "<new resource group name>" –l "<Azure DC location for resource group>" –f "<Path for template JSON file>" -e "<Path for parameter JSON file>"
- Wait for the deployment to complete.
- If any errors have caused deployment to fail, view the error description, take appropriate action, and rerun the previous step. Common causes could be invalid template file, missing parameters, incorrect parameters like invalid name for Logical SQL Server name, etc.
- If any errors have caused deployment to fail, view the error description, take appropriate action, and rerun the previous step. Common causes could be invalid template file, missing parameters, incorrect parameters like invalid name for Logical SQL Server name, etc.
Create SQL Azure DB using Azure portal for a customer as a CSP Reseller
Prerequisites
The following are the prerequisites for this section:
- The Customer and Azure subscription for the customer are already created by the CSP reseller.
Create SQL Azure DB using Azure Portal
- Visit the Microsoft Partner Center portal: https://partnercenter.microsoft.com and login using the CSP credentials.
- Click on "View customers" link under Customer Management section.
- Expand the view for the customer to view details.

- Click on "Microsoft Azure Management Portal" link to visit the Azure portal on behalf of the customer.
- Alternately, login directly to the Azure Portal on behalf of customer, without going through the Partner Center portal by visiting the URL https://portal.azure.com/<customer domain name here> and login using CSP credentials.
- Alternately, login directly to the Azure Portal on behalf of customer, without going through the Partner Center portal by visiting the URL https://portal.azure.com/<customer domain name here> and login using CSP credentials.

- The Azure portal will open in a new tab/new window. Hover the mouse over identity icon on top right hand corner of the portal or click on it to view the Customer info.

- Click on "New" icon in the Navigation bar on the left hand side of the portal. From the menu options displayed Click on "Data + Storage" and Click on "SQL Database" to proceed to create an Azure SQL DB for the customer.

- Type all the details that is prompted for in the SQL Database blade. This includes SQL logical server name, server admin username and password, server location, pricing tier, and collation.etc.
Click on "Create" to start the deployment.

- Click on Notifications icon to view the status of the deployment.

- Wait for the deployment to complete.

- Add the firewall rule to allow access for the client machine to connect to the logical server.
For this, Select Browse -> SQL server -> Select server -> Show firewall settings- Type the IP address range to be given access and save. To allow current only current client machine IP, Click on "Add Client IP" link in the blade.
- Type the IP address range to be given access and save. To allow current only current client machine IP, Click on "Add Client IP" link in the blade.

- Open SQL Management Studio and connect to the logical server deployed using the username and password specified during deployment.
- On successful login, the database created will be present. If unable to login, check the error message displayed - common cause could be IP Address of client machine not being added for access to logical server.
